Welcome to News Blast, where we bring you the latest headlines, in-depth analysis, and trending topics from around the world. Stay informed with our comprehensive coverage and expert insights.
News Blast Copyright. All rights reserved 2020-2024
Your daily source for breaking news and insightful articles.
Transform your space! Discover stunning DIY ideas to revitalize old furniture and unleash your inner designer. Turn drab into fab today!
Transforming your old furniture with easy DIY ideas can breathe new life into your home. Here are 10 simple projects that require minimal skills and can be completed in just a few hours. From repurposing weathered chairs to upcycling wooden crates, these tips will inspire you to turn those forgotten pieces into stylish, functional items.
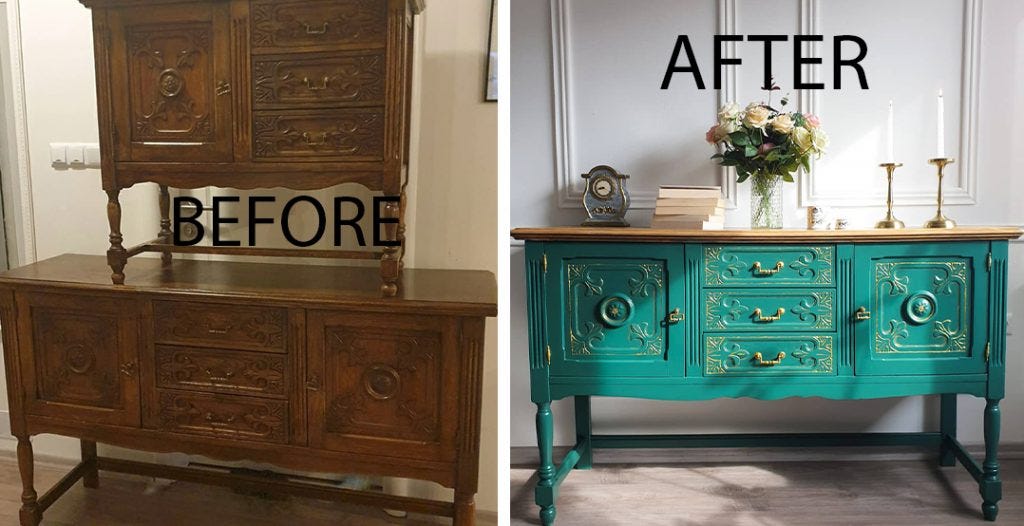
Upcycling is an innovative and sustainable practice that transforms drab furniture into stunning, one-of-a-kind pieces. Whether you’re looking to refresh your space or reduce waste, this guide will introduce you to the basics of upcycling. You don’t need to be a professional craftsman to create fabulous furniture; all you need is a bit of creativity and the right tools. Start by gathering essential supplies like sandpaper, paint, brushes, and any decorative elements you wish to incorporate. Consider choosing pieces with good bones that just need a little love, so you can truly turn them into works of art.
To successfully upcycle your furniture, follow these simple steps:
With these steps, your once drab furniture can become the star of your living space, showcasing not only your creativity but also your commitment to sustainability.
Refreshing your old furniture can breathe new life into your living space and is often a more sustainable choice than buying new pieces. To get started, you'll need a handful of essential supplies that will help transform your outdated items. Begin with sandpaper or a power sander, which is crucial for smoothing the surface and removing old finishes. Depending on the piece, you may also require primer and paint or wood stain to achieve the desired look. For upholstered furniture, gather fabrics, batting, and staples or a staple gun for a complete makeover. Don't forget safety gear like gloves and a mask to protect yourself while working.
In addition to these basic supplies, consider acquiring decorative hardware such as new knobs or handles to give your refreshed furniture a stylish touch. A paintbrush or roller will be necessary for applying finishes evenly, while a drop cloth protects your working area from spills and drips. Lastly, having cleaning supplies on hand will help you prep the furniture before beginning the makeover process. With the right tools and materials, you can transform your old furniture into stunning focal points for your home.